|
|

|
. |
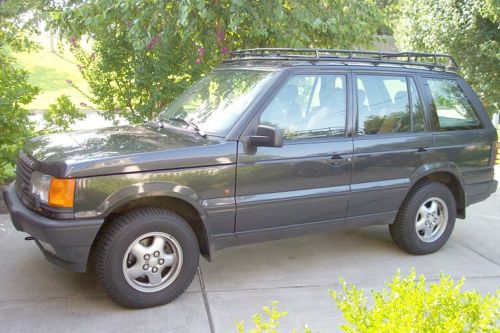
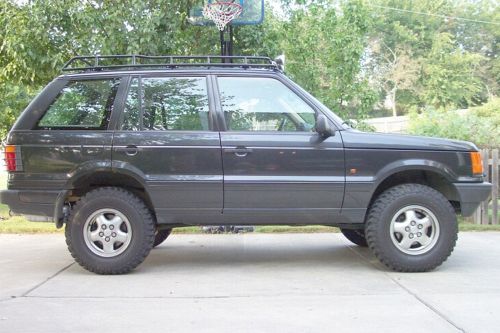
 ...From this... ...From this......to this...  OKRovers Club Member Alan Bates |
. |
|
. |
| . |
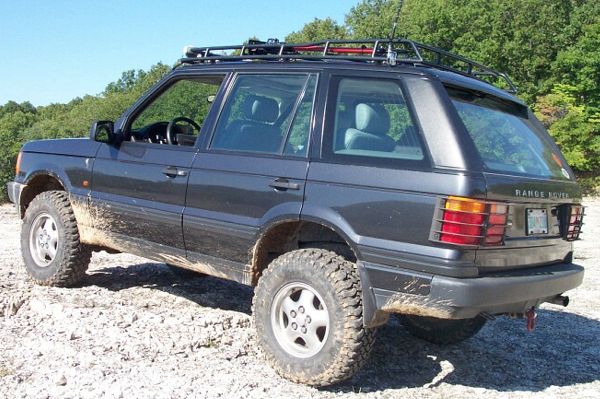
  BACKGROUND: BACKGROUND:The second generation Range Rover 1995-2001 P38 came with an electronic air suspension (EAS) system and solid axles. The EAS system works wonderfully when functioning correctly, but can be a liability when problems occur, especially if on the trail. I wanted to completely eliminate the EAS system and at the same time lift the P38 so that it would perform better off-road. The first step is to install an EAS to spring conversion kit and two companies offer them for the P38, Atlantic British and Motorcarsltd (see links below). Both kits basically provide you with new upper and lower coil spring seats where the air springs once were mounted. I am not going into detail about the installation of the EAS conversion kit, but it is a very easy and straight forward installation (See sidebar for a link to the Atlantic British installation instructions). The installation of the Motorcarsltd kit is very similar, the only difference is the Motorcarsltd kit utilizes a one piece spring seat, while the Atlantic British kit utilizes stock Land Rover spring seats along with a spring perch adapter. My 96 RR has the Motorcarsltd kit, but the Atlantic British kit should probably yield similar lift results. I am also currently running Bilstein B46-2214 shocks in the front and B46-2215 in the rear. LIFT:What I did was basically replace the coil springs that came with the conversion kit with Old Man Emu (OME) springs, added a front shock relocation bracket, and installed longer sway bar quick disconnect links. I had no idea how much lift I would get from installing OME springs so it was a shot in the dark. I chose OME 761 Passenger Side (PS) medium duty springs for the front and OME 781 (PS) md/hd springs for the rear. I was very pleased with the 781’s in the back of my 92 RRC so I decided to try these again on the P38. I have 751’s in the front of the RRC that has an ARB and winch so I figured 761’s might be a good choice for the P38 as it only has the stock bumper. Again I am not going into detail about installing springs as it is already well documented, pretty much the same as any spring install but here are a few pointers: Remove bottom shock bolt and sway bar links so that you can drop the axle as low as possible. Watch your brake lines. You can then install the OME springs in without a spring compressor. Remove or trim the front mudflaps if you have them as they will interfere under certain conditions if you fit larger tires. Rear Springs: Remove bottom shock bolt, no rear sway bar so no links, unbolt the frame mounted brake line bracket to so that you can drop the axle further. Drop the axle and watch your brake lines. You can then install the OME springs in without a spring compressor. Upon initial OME spring install, the rear sat about 1.5" taller than the front. To alleviate this problem I added 15 mm of trim packers to the front of each spring, 10 mm of trim packers to the bottom of the front spring seat and a 5 mm trim packer to the upper front spring seat, this brought the front end up about 0.60". (Please note that the Motorcarsltd kit’s spring seats are very deep thus allowing me to install the trim packers without any fear of the spring possibly popping out, the Atlantic British kit’s lower spring seats are the stock Land Rover seats and I would not recommend putting trim packers below the springs on these. You could possibly install trim packers on the upper spring seat with the Atlantic British Kit, but I am not sure) The P38 now sits about 7/8" higher in the rear when unloaded and almost perfectly level when fully loaded with gas, tools, gear, equipment, etc. Shock Relocation Bracket: I would strongly advise doing this or installing longer shocks as you would lose about 3" of downtravel if you don’t. This would, in my opinion, limit front axle articulation. I had onlinemetals cut me two pieces of 3/16" thick 3" square tube to 2" lengths. I then had to air chisel out the old bushing mounts located on top of bottom shock bracket so that the relocation brackets could sit firmly. (The bushing mounts are only spot welded so they were fairly easy to remove, you could also possibly saw them off too). I then bolted the relocation bracket to the original shock mount location and then bolted the shock to the relocation bracket. I got back the 3" of lost downtravel. An option is to have the relocation brackets made out of ¼" thick steel or weld a plate to one of the open ends for increased strength. I have not experienced any problems with the 3/16" thick brackets as they are. I had a very slight rubbing of the relocation bracket to the outer lip of the inside of the wheel under full steering turn, so I adjusted the steering stops out a little bit, no more rubbing. You could easily grind an edge of the relocation bracket if you have this clearance problem. The rear shocks were mounted in the stock location. The rear axle has a much longer range of motion so I was not too worried about rear articulation, plus I don’t see how I would devise something to relocate the rear shock. Sway Bar Quick Disconnects: I used JKS quicker disconnects designed for a Jeep Grand Cherokee 99-present WJ, model #3100. The stock front sway bar links will be too short once the OME springs are installed and will again limit downtravel. No rear swaybars on the P38. The JKS disconnects are adjustable in length and are approximately 3" longer at its shortest length than the stock links, which made it perfect for this purpose. I had to enlarge the existing sway bar link mounting holes a little to fit the JKS disconnects. I also had to purchase two shorter mounting bolts, one for each link, as the JKS’s came with a spacer and a longer bolt for one of the mounting holes. Discard the spacer and bolt, and use the shorter bolt. Brakelines: The front brakelines were almost fully extended once everything was put back together and the axle dropped as low as it would go. The shocks and JKS disconnects limited the downtravel. In the rear, the brakelines were not a problem since I kept the stock length Bilstein shocks and they limited the downtravel. LIFT RESULTS AND PERFORMANCE:According to Atlantic British, the height of a P38 in standard ride height with stock tires measured from the ground to the top of the wheel well is 31-3/4" in the front, and 32" in the rear. With the OME 761 PS in front + 15 mm of trim packers and 781 PS in the rear, I measured 34-7/8" front and 35-3/4" in rear, with stock tires. This equates to a lift of 3-1/8" in the front and 3-3/4" in the rear. With BFG MT/KM 265/75/16 tires it measured 36-3/8" in the front and 37-1/4" in the rear. Please note that the stock coil springs in these kits are much shorter than the OME’s and that is why I got so much lift. The OME springs ride great. Firm but not harsh and handles bumps and turns very well. Tracking at highway speeds is not as good as stock but definitely very very good for the amount of lift and the larger MT tires. I have not experienced any driveline vibrations at this moment and just returned from a 1900 mile trip to Colorado and the lifted P38 on MT’s handled the winding mountain roads very well. It also cruised pretty effortlessly on the highway. Road handling would be even better with an AT tire. Off-Road Performance I could not be happier. Ran three days of varied terrain trails in Ouray and Gunnison area with excellent results. On rocky trails, the P38 just walked up the rocks and obstacles, the articulation was excellent, and the axles rocked and rolled while the body stayed straight. Front approach and rear departure angles are also greatly improved. After a while, I would look for the most difficult line and the P38 just cruised through. The combination of the OME lift, MT tires, and rear traction control (95-98), front and rear on (99-01), made for quick work on moderate to difficult trails. OTHER SPRING OPTIONS:In hindsight, I would have probably chosen a longer front spring so that I could get away from using trim packers. An option is to put 761 Driver Side (DS) springs in instead of the 761 PS, this would give you a slightly taller spring and maybe use less trim packers. 764’s could also be an option and would give you about 0.4" over my 761 PS + 15mm trim packer combination. I will probably go this route if I add a winch. I also don’t see a problem using 751’s in the front or 762’s in the rear if one is inclined to do so, and it would probably yield a very similar amount of lift. CONCLUSION:I could not be happier on how the lift turned out, but will be looking into some longer shocks in the future. The P38 having a longer wheelbase (108") makes for much better rear passenger room and the cargo area is also very large. With the coil spring lift, it drives great on the road, and it is also great off-road, plus no more EAS worries. This in my opinion, makes the already good P38 an even better all round vehicle. Add a pair of ARB’s, sliders, diff guards, winch, etc. and this would be one great trail vehicle. Hope this helps anyone interested, and hope to see more people modding the P38. FUTURE PROJECT:A true P38 winch bumper. |
. |
 EAS Coversion Kits www.AtlanticBritish.com www.MotorCarsLtd.com  EAS Installation www.AtlanticBritish.com 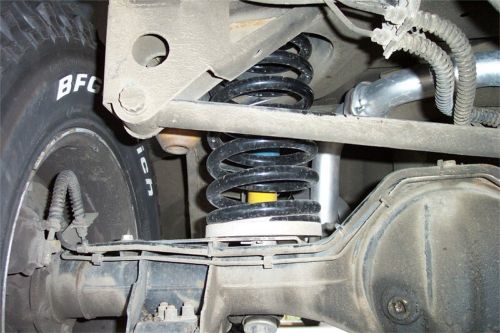 Shock Relocation Bracket www.OnlineMetals.com 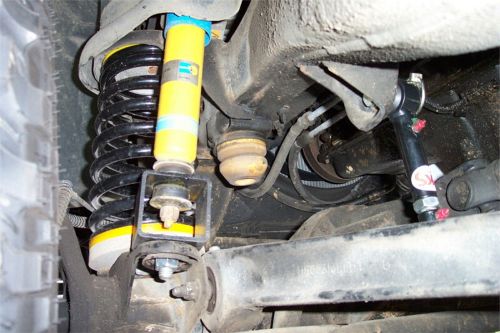 Sway Bar Quick Disconnects www.OnlineMetals.com 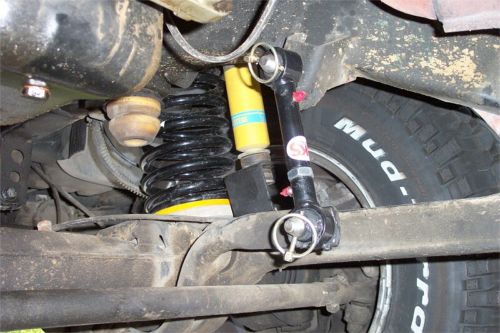 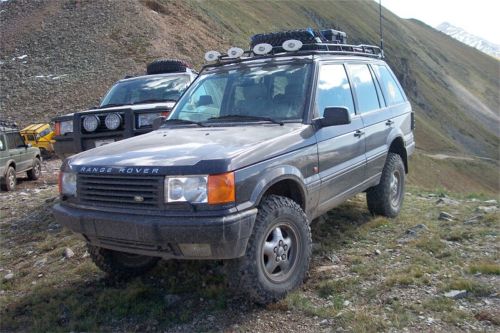 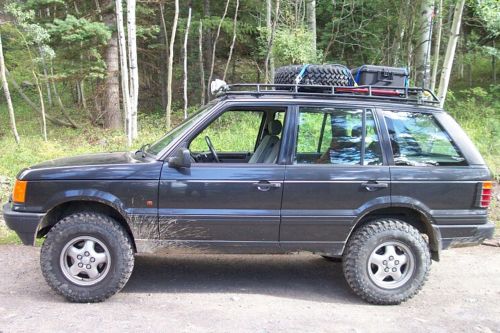 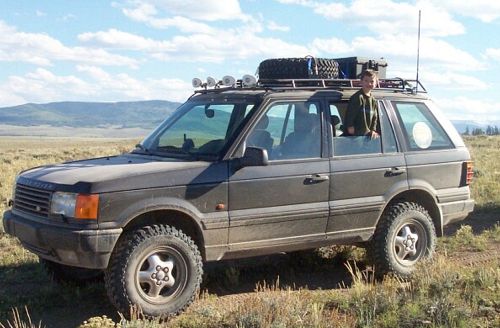 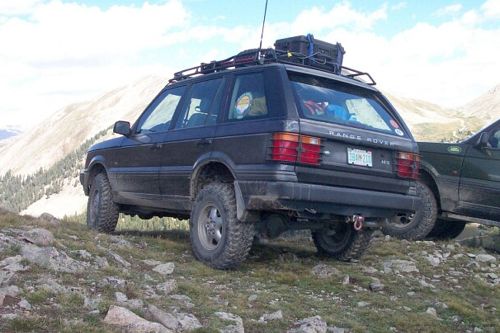 |
. |